Showing posts with label Home made. Show all posts

Tuesday, April 15, 2014

Chicken Quesadillas

I am always trying to do different things with chicken, because I feel like it can be one of the more boring meats and it's harder to eat leftover for me.  Flipping through recipe ideas I got a craving for quesadillas and remembered that I had a nifty quesadilla maker sitting on a shelf in my garage that was being severely under utilized.  *Don't get discouraged if you do not own a quesadilla maker, you can still make this recipe just fine in a pan on the stove.  This is a very quick and delicious recipe.  Enjoy!

Ingredients:
2 Tbsp Butter
2 Chicken Breasts (Thinly Sliced)
Seasoning (Alpine Touch, Lime Pepper, Cumin Powder)
Pack of flour tortillas
Shredded Cheese
Toppings (Mix and match in whatever way you desire)
Red Pepper (Seeded & Sliced)
Green Onions (Chopped)
Avocado (Seeded, Peeled & Sliced)
Salsa
Sour Cream
Cilantro

Directions:
 Add the butter to a skillet and place the sliced chicken into the pan, add the seasoning  Cook until down all the way through.  Pre-heat the quesadilla maker (or the pan if you prefer).  Get a tortilla for the bottom of you quesadilla.  Sprinkle shredded cheese on the bottom and top with a couple pieces of the cooked chicken.  Add the accoutrements (peppers, green onions, avocado) and top with a final sprinkle of cheese.  Place on the quesadilla maker (or in the pan on med-high) and add a top tortilla to cover.  Cook for about 30-60 seconds to warm all the way through (if cooking in a pan flip after 30 seconds and cook for another 30, once you start to see melted cheese you should be good to go).  Remove and cut along the grooves made by the quesdilla maker (if using a pan just cut to preference).  Serve with salsa and Sour cream with cilantro on top.  Enjoy!

Add the chicken and seasoning to the butter in the pan
Cook thoroughly
Get out your bottom tortilla and add cheese and chicken
Add the peppers, green onions & avocado
Top with more cheese and place on the quesadilla maker)
Add the top tortilla
Cook for 30-60 minutes
Remove and cut along the grooves
Serve & Enjoy!

Monday, February 3, 2014

Superbowl Chili & Pizza Bicuits

I was lucky enough to have a lot of family in town for Super Bowl Sunday which gave me the opportunity to cook.  I made some slow Cooker Super Bowl Chili and some Pizza Biscuits!  Here are both of the recipes in case you would like to try making some on your own!  Enjoy, it turned out delicious!

Slow Cooker Super Bowl Chili

Ingredients:

2 lb Ground Hamburger
Seasoning (Garlic Powder, Mediterranean Spiced Sea Salt, Crushed Red Pepper, Basil, Thyme)
1 12oz can Tomato Paste
2 14.5 oz cans Diced Basil Oregano Tomatoes
1 15 oz can Black Beans
1 15 oz can Great Northern Beans

1 Zucchini (peeled & chopped)
5 Radishes (diced)
3 Celery Stalks (chopped)
3 Garlic Cloves (minced)
1/4 Cup Fresh Parsley (Chopped)
1 Cup Chicken Stock
Shredded Cheese to top

Directions:
Put the ground hamburger into the slow cooker and turn the heat up to high.  Generously season the meat. Add the tomato paste and then fill the can of paste with water and add to the slow cooker.  Add both cans of diced tomatoes and both kinds of beans. Stir to mix.  Add the vegetables and stir to mix thoroughly.  Top with the chicken stock and make sure that everything is stirred to mix.  Cook on high for about 3 hours.  Be sure to stir periodically.  Turn the slow cooker down to low and continue to cook for another hour or two.  If you have more time you can keep on low or warm for several hours until you are ready to eat.  Serve and top with shredded cheese and a dash of basil.  Enjoy! 

Add the hamburger to the slow cooker and season the meat
The beans and tomatoes I used
Add the tomato paste, tomatoes and beans to the slow cooker
Add the veggies & parsley
Add the chicken stock and stir
Serve with cheese sprinkled over top and a dash of basil

 Pizza Biscuits

Ingredients:
1 Cannister of Refrigerated Biscuits
3-4 Mozzarella Cheese Sticks
Pizza Sauce
Basil

Directions:
Preheat the oven to 400 degrees.  Lay the biscuits out on an ungreased cookie sheet just like you would for making biscuits normally.  Cut the cheese sticks into 3 or 4 pieces and press them down into the middle of the biscuits.  Spoon pizza sauce over top of the cheese.  Just enough to cover, but not so much that it is dripping onto the pan.  Add a dash of basil to the top.  Bake in the oven for about 8-11 minutes until the biscuits have risen and the cheese is melted.  Allow 5 minutes to cool, serve and enjoy!  You may serve with extra sauce if you want to dip them.

All the ingredients you will need

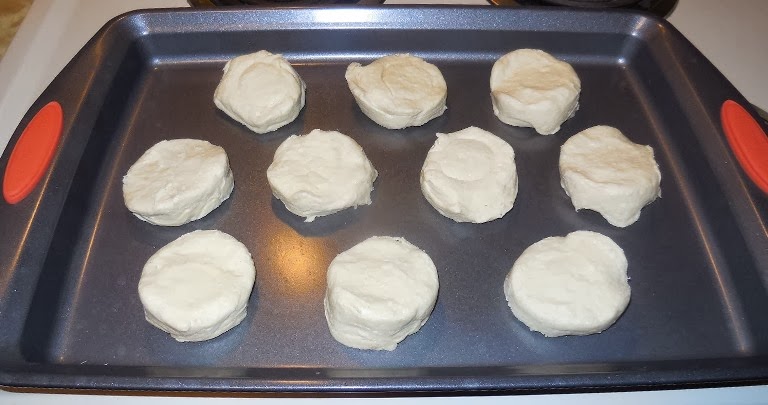
Place the biscuits on the cookie sheet
Press the cheese into the middle of the biscuits

Spoon pizza sauce on top of the cheese
Cook and enjoy :)

Saturday, January 25, 2014

How To Make Bubble Tea

As my Bubble/Boba Tea addiction has been spreading, I have been getting many inquiries about what it is and how to make it!  I previously wrote a blog about the background of the delicious drink and figured it was about time that I wrote a step by step instruction blog.  Enjoy!  And please let me know if you have any questions.

If you want to view the blog about what Bubble Tea is check it out: Bubble Tea: My Addiction

Today we decided to make Apple Cinnamon Honey Dew Bubble Tea :)  it was the most delicious combination of flavors yet!

Ingredients:
2 Cups Pearl Tapioca
3 Tbsp Honey (You can also use simple syrup if you prefer)
Apple Cinnamon Tea
Milk (I used Rice Milk)
4-5 squirts of Honey Dew flavored syrup
Wide Straws (Straws with Tapered ends make getting any remaining tapioca easier at the end of the drink)

Directions:
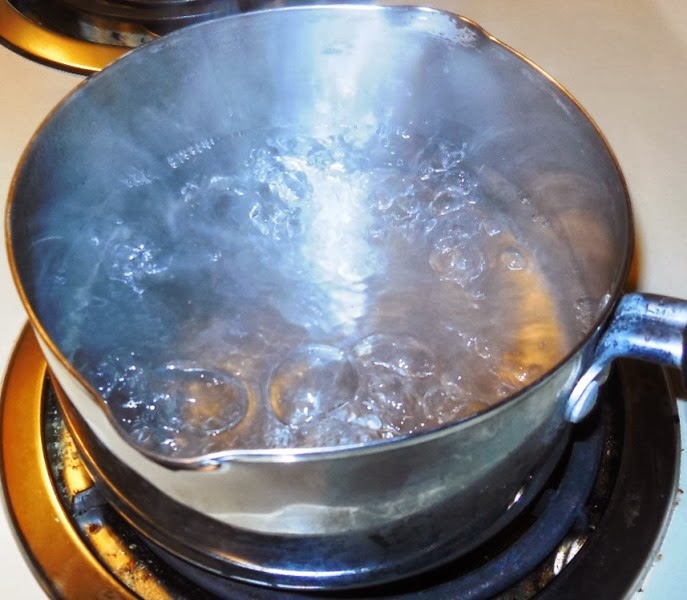
Get a sauce pan to a roiling boil with about 4 Cups of water.  (It is imperative that the water is boiling before you add the tapioca or it will turn into goop)
Prepare Tea
Strain out 2 Cups of Pearl Tapioca to shake off any loose powder.
Add the pearl tapioca to the boiling water and stir continuously for about 10-15 minutes (they should be a little bit chewy).
Pour into a strainer and run cold water on the tapioca to keep from sticking together.
Add 3 Tbsp Honey to a Container with a lid, heat up for about 15 seconds.  Add the tapioca to the Container and top just barely with cold water.  Stir until the honey is thoroughly mixed in.  
Pour the brewed tea in to a Large glass (possibly a pilsner glass) about 3/4 or a little more full.  Add 4-5 squirts of the Honey Dew syrup.  Put 2-3 Large spoonfuls of the Tapioca into the glass.  Top off with any kind of milk you would like, I used rice milk.  Place the straw into the cup and stir thoroughly.  Enjoy!

First you need the Tapioca! 
Put about 2 Cups of tapioca in a strainer and shake it around a little bit to get rid of any loose powder
Select a tea that goes with the flavor you want to use
Bring water to a rolling boil
Brew the tea
Add the tapioca and stir continuously
Pour the tapioca into a strainer and run cold water over top
Get the honey out
Add honey to a seal able container
Microwave for 15 seconds
Pour the tapioca into the container and top with water
Pour the brewed tea into the serving glasses about 3/4 of the way full

Add the honey dew syrup to the tea
Add 2-3 spoonfuls of the pearl tapioca
Top with Milk
Pick a wide straw to use
Add the straw to the glass, stir thoroughly and serve!

Sunday, January 19, 2014

Meditation Jar: Our Attempt

I posted a blog a couple of days ago with a few DIY kid projects that I wanted Liam and I to try.  We decided to try the meditation jar ourselves.  It turned out quite well overall.  Liam had a wonderful time and it was minimal mess.  We had one small mishap when I accidentally hit the table and spilled one of the bottles before the water was in it, but we cleaned it up easily.
We followed the steps but not in the exact order.  The two changes we would make would be that  we should have put the glitter in after the water so that there was no glue globs and that we would not have put as much food coloring in, but with Liam in charge it still turned out great!  The pictures don't show the glitter as well as in person.
I was really excited to try this out as the alternative to timeout to see if it would be effective on Liam or not.  Later in the day we did end up needing to use it, and when it was a time that I would have put Liam into timeout, I had him take one of the bottles and shake it up.  The first time he wanted a different color than the one I handed to him but then he calmed down right away.  However the second time it was amazing, once I could get it into his hand and have him shake it up and tell him to watch the glitter fall to the bottom, almost instantly he was calm and didn't even need to wait for the glitter to finish falling and he could go on with his day!  I truly couldn't believe it.  I know it sounds really hoaxy, but I swear that is exactly how it worked.  No idea if it will continue to work this way or not, but it's nice to at least have another effective step of some way to get Liam in control of his feelings and change the situation without timeout. 

Supplies:
- Plastic Bottle (or you can use the mason jar or baby food jar that was in the original post)
- Glitter Glue
- Food Coloring
- Warm Water

Directions:
Mix about 1 tablespoon of glitter glue with 1 cup of warm water...depending on the size of your bottle. We decided to do more than one so that there would be options.  I noticed that each time it was needed Liam wanted to try a different color.  I also changed to a  plastic bottle from glass so that it was not as easily breakable.  


Here are our step by step photos!  Enjoy and good luck, I would love to see any photos and hear any stories of anyone else who has or does try this out!  Good luck, it worked fabulously for us.

Getting our supplies ready


Adding the Glitter Glue


Adding Food Coloring


Add Warm Water & Shake


If You want to see the original DIY:Activities Blog Click: DIY Kid Activities