Showing posts with label Crafts. Show all posts

Thursday, March 20, 2014

DIY: Easter Arts & Crafts for Kids

If you know me, you know that I like to find at least one fun and unique thing to do with my 3 year old son every weekend.  With Easter fast approaching, I have been looking around for some fun ideas for us to do.  A couple of the ideas I have been waiting for months to do for Easter, and some are new and fun!  Feel free to steal any and use yourself.  I would love to see pictures of your end results!

Easter Egg Sun-catchers


Easter Egg Sun-catcher
I just love this activity, it is fun, a bit messy and something that can be hung up int he window!  Liam loves things that we can hang up and that will last for a very long time :)

Supplies:
Confetti
Easter Grass
Contact Paper
Painters Tape (or other heavy duty tape)
Double-Sided Tape (Just in case you need to seal the eggs better)

Directions:
Place the contact paper on the table sticky side up using painter’s tape to keep it on the table. Add the confetti and Easter grass to stick onto the contact paper.  Add it to your heart's content and throw it around all over.  Seal it by adding a second sheet on contact paper on the top.  Cut into an egg shape or several egg shapes.  It is possibly that you may need to extra seal with double-sided tape in case the confetti is too thick.  Hang and enjoy!


Magic Balloon Treats

Magic Balloon Treats
I have been wanting to do this one for MONTHS!  I have been waiting for Easter on purpose!

Supplies
Water Balloons
Yarn or String
Crafting Glue
Candy


Directions:
Place candy inside of the balloon.  Blow up the balloon.  Mix equal parts crafting glue & water, wrap around the balloon.  Wait until dry and pop the balloon.


Striped Easter Eggs

Striped Eggs
I love how this look is both very clean and colorful looking.  It doesn't seem to be immensely challenging either, which means that my son will be able to help with it!

Supplies:
Hard Boiled Eggs
Easter Egg Dye (or food coloring)
Electrical Tape

Directions:
Partially wrap eggs with electrical tape.  Dye the eggs.  Allow to dry and remove the tape.  Do it again in an alternating direction with a different color.  Dry and remove the tape, there you have it :)


Shaving Cream Egg Art

Shaving Cream Egg
Last year we tried doing the shaving cream and food coloring method to dye our Easter Eggs and it did NOT turn out the way it was supposed to.  I do think that paper may work better with the colors though, and I do not currently own a squeegee....

Supplies:
A surface to use, tray covered table, etc
Shaving Cream
Cardstock or Construction Paper
Acrylic Paints (Food Coloring gel works best)
Squeegee
Something to stir the paint (Spoon, toothpick, paintbrush)

Directions:
Spray out enough shaving cream so that the surface area is larger than your paper.  Spread it around to make the surface smooth.  Squirt paint or dye onto the shaving cream.  Make shapes, or swirls or zigzags in the color.  Cut the paper into shapes (in this case Easter shapes).  Press the paper down onto the colored shaving cream and let it sit for a few seconds.  Remove the paper and let it sit shaving cream side up for a few minutes to soak in the color.  gently squeegee the shaving cream off of the paper which will leave the color behind.  Allow to dry before hanging or using as a card.


Ombre Dyed Eggs
This looks very pretty and very low mess.

Supplies:
Hard Boiled Eggs
Food Coloring
Cups

Instructions:
Place eggs into cups or containers that will allow them to sit upright.  Add enough warm water to cover about a quarter of the egg.  Add enough food coloring for it the color to show darkly in the water.  Let sit 10 minutes and then add enough water so that the eggs are now half covered.  Let sit for another 10 minutes and cover up to the 3/4 mark.  Sit for another 10 minutes and cover completely.  After 5 minutes of total immersion you can remove to dry.  *Keep in mind that 40 additional minutes in warm water may cook the egg yolk a bit more.


Plastic Egg Snake Toy

Plastic Snake Toy
This is a great way to utilize your leftover plastic eggs and turn them into something fun and awesome :)

Supplies:
Plastic Lacing Cord
Newer Style Plastic Easter Eggs with two holes on the top and bottom
Googly Eyes
Red Paper Tongue

Instructions:
Cut the plastic lacing cord to about 3 feet long.  Know the end.  Threat the cord through on of the top shell openings.  Continue threading the cord through the eggs alternating from the left and right holes as you go.  Knot the end of the lacing cord when you have threaded all the top egg shells.  Decorate the snake head using the bottom of on of the eggs.  Attach googly eyes and a red paper tongue to the snakes face.  Snap it in place onto the last top egg shell.  Bend and slither and play.  

Wednesday, February 12, 2014

Activities For Children: DIY Part 2

I am always looking for different fun crafts and activities that Liam and I can do together!  And last month I started a Children's DIY (Do-It-Yourself) blog.  The following weekend, Liam (my three year old son) and I chose one of the activities and made it our own!  Last month we ended up making Meditation Jars!  This was both fun and effective!  This month I want to chose at least one other activity for us to do, possibly on this long 3 weekend we have coming up or any other free time between now and the end of the month!  Here are some of our ideas!  Please submit any of your own ideas! 

Rainstorm


My son is obsessed with whether or not it is raining outside, so I am sure that he would love creating a rainstorm!  What a fun quick and easy activity!


Supplies:
-Drinking glass or vase
-Food coloring
-Water
-Shaving cream


Directions:
Fill drinking glass or vase with water and then top the water completely with shaving cream (clouds).
Then add blue food coloring to the "clouds".  (This works best to concentrate the food coloring in a couple of areas as opposed to singular drops here and there).  You can also add to the fun by adding multiple colors


Alphabet Train

Borrowed from Kiwicrate.com
I absolutely love the idea of this one!  It is both fun, time consuming, hands on, and a great learning experience! 


Supplies:

Paper
Alphabet Letters (Of you can just draw your own letters onto the paper)
Items from around the house that start with all of the letters in the alphabet!  

Directions: 
Lay out the paper in a "train" and add the letters!  Now go around and find the items that match up with the letters.


 Salt Painting

This is a great and easy way to have a fun painting time at home with not too much of a mess.  I have seen a lot of people try this and similar things out in the past and have been wanting to try it with Liam since he is totally into creating different works of art. 


Supplies:
-Construction paper/cardstock
-Paintbrush and/or medicine dropper
-Colored water (we used about a tablespoon of water with 6-7 drops of food coloring)
-Salt
-Glue
-Little bowls for colored water


Directions:
Have your child draw a picture with glue.Then sprinkle the glue with salt.  We did this on top of a piece of cardboard, but a baking sheet will work well too. Next have your child take a paintbrush or a medicine dropper and drop colored water, one drop at a time onto the salt.
Some tips: Make sure they lightly touch the salt with the brush.  It also helps to have a bowl to clean the brush in between colors...otherwise you lose the colors start blending together and you lose the vibrant colors because they become murky.

Kool-Aid Dyed Rice & Pasta


This is a great way for what many people call "Sensory Learning."  It is suggested that you get a sensory bin (any kind of plastic shallow tray or bin) and then you want to have various colored objects of all shapes and sizes and then you child can learn from these things and play with them.  Personally I think that a lot of these things can double as art supplies if you have some glue on hand, to include this project.  

Supplies:
1 Cup Rice or 1 Cup Pasta
1/2 tsp Kool-Aid
1 tsp Rubbing Alcohol
Gallon or large plastic Ziplock bags
Tin Foil
Cookie Sheet

Directions:
Gather your tools and start by standing up and opening your large freezer bag. A freezer bag (and not just a regular gallon bag) is imperative for the dying process because of it's thickness--the bag will stand up on its own and will also hold up better to leakage than a standard bag. Use one bag for each color you wish to make.
First, have your child add 1 cup of rice to each bag. Then, have him or her scoop out a 1/2 teaspoon of power out of each Kool-Aid packet. (Each Kool-Aid packet typically has 1 teaspoon of powder in it.) Pour the powder on top of the rice. For the last step, which is a mama step, add 1 teaspoon of rubbing alcohol to each bag on top of the previous two ingredients.
Seal the bag shut (because I can attest that wet Kool-Aid rice is NOT a fun experience to clean up!) and shake it up (this can be a fun part in the process for the kids to do too)! Let it sit for at least 15 minutes to saturate.
Next, pour the wet rice out onto a tray and get it as flat as it will go so that you can dry it overnight (or for at least 6-8 hours). When I dye rice or pasta, I usually make little tin foil sections in the tray to separate the colors. When it is dry, the rice will be all clumped together; separate the rice grains with your hands. (This is also a fun step for kiddo involvement too!)


* Here is our Meditation Jar Activity: Meditation Jar: Our Attempt
* The Original DIY Children's blog: DIY Kid Activities
* As an added bonus here is the DIY Orange Sugar Scrub from this weekend: Valentine's Orange Sugar Scrub

Sunday, February 9, 2014

Valentine's Orange Sugar Scrub

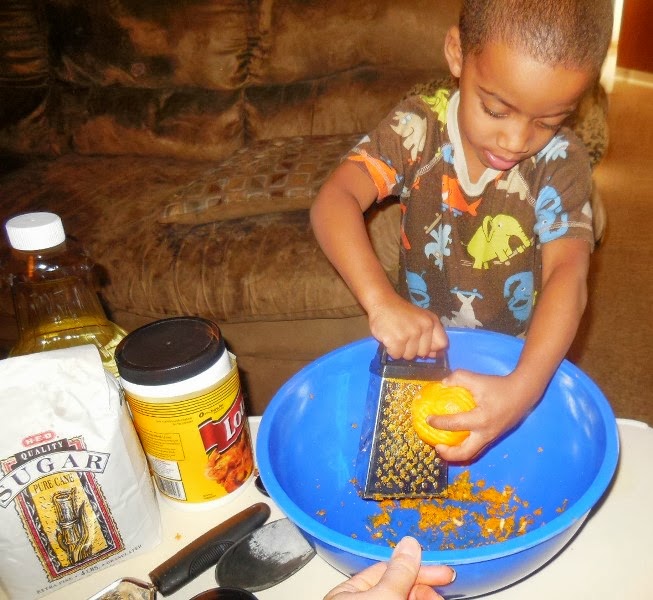
Liam and I decided to go with this awesome DIY (Do-It-Yourself) idea for Valentine's this year!  It is SO easy that Liam could help with the entire making of the scrub with me and only needed minimal hands off with preparing the jars!  The scrub is made out of a lot of normal every-day household items!  The jars we got at a craft store along with the glue gun and Valentine's ribbon.  The scrub is actually made out of all safe ingredients and is technically edible as Liam was exited to continually inform me throughout the process haha.  I must admit that my crafty side has been locked away for many years and this was the first time I haev used a glue gun in quite some time....  I definitely need more practice at it, and could have used more time for better perfection, but I think that they still turned out well for the first time in a long time.  With that said, if I can do this than ANYONE can!

Scrub Ingredients:
Makes 1 Cup
Zest of 1-2 Oranges (1 if regular, 2 if mini)
1 cup of granulated sugar
2 tablespoons of organic virgin coconut oil
1 tablespoon of organic extra virgin olive oil

I made enough for 4 Cups so you would just mulitply the recipe:
Zest of 4 Oranges
4 cups of granulated sugar
8 tablespoons of organic virgin coconut oil
4 tablespoons of organic extra virgin olive oil

Directions:
In a medium mixing bowl, simple stir all ingredient together until well blended.  My coconut oil is normally solidified at room temperature and that’s just fine.  Do not heat it up to melt it, as the heat might melt the sugar.  Simple mix all ingredient with a spoon and it’ll come together nicely.

*For my jars, I just bought 4 small (15 oz) candle jars, and a spool of Heart ribbon.  I used a glue gun to attach the ribbon to the top of the candle jar to make it have more of a Valentine's feel.  I will most likely add a nice small bow to the top of the scrub for the people I give them out to!  Feel free to customize it however you want!  You can do this for ANY holiday!

Get the ingredients out!
Zest your oranges!
Zesting is hard work
Add the sugar
Keep going!
Add the coconut oil
Add the olive oil!
Get ready to stir!
Mix it up thoroughly!
Get out the jars, ribbon and glue gun!
Glue the ribbon to the top of the jars
Add the scrub to the jars!
There you have it!  Orange Scrub Valentine's gifts!

Friday, January 31, 2014

DIY: Valentine's Ideas For Women

With Valentine's Day fast approaching I know that I will be spending another year without a Valentine.  I do not say this with regret, sadness or loneliness, just as a statement of fact.  I bring this up only because I want to do something special for myself.  I want a nice homemade gift from one of my favorite people in the world me!  And then an even more favorite person in the world can help me, my son of course!  So in the true crafty spirit I have found a few DIY ideas that will get the creative juices flowing and allow Liam and I to choose something awesome to create that I can enjoy on Valentine's Day!  I decided to write a blog about it because I know that I am not the only woman out there that loves a more personal gift, and what better time to receive than Valentine's.  Here are some of the top ideas that I have come up with and will pick one to do a step-by-step blog on in the spirit of Valentine's Day!  I would love to see other DIY projects that anyone else has come across and hear about any of your attempts to recreate these ideas!  Good luck and I hope that in whatever capacity you spend V-Day in that it is full of happiness and love!

Sweet Orange Lip Balm
This sounds delicious and doesn't look TOO difficult, although I don't think I need to make so much or but it in as crazy of containers.


 If you are interested in making this check it out at:
All Natural Lip Balm


If you would like a salve that was a bit more earthy you could make the homemade salve:

Directions here:
Homemade Salve


Kitchen Herb Garden
I know that there are MANY MANY variations as to how to make a quick and easy herb garden, but this is just one example. 

check it out here:

Kitchen Herb Garden


Bath Tea
I love tea and I love a nice hot bath...  So why not combine the two!  Bath tea, what an excellent ideas! 

You can find the directions here:

Homemade Bath Tea


Valentine's Day Journal
This may have been originally intended for a teacher and for V-Day but I could easily see this being made for ANYONE and using any sort of decoration.  I can totally see Liam helping me out on this and giving me an awesome hand print or something cool! 

If you would like to make your own check it out here:

Valentine's Day Journal


Soaks & Scrubs

I am down with either one.  You can never have enough of this stuff and homemade is always great because you get to chose your own scents and customize it!  So easy to do!


For the herbal Foot Soak go to :

Herbal Foot Soak Recipe


For the sugar scrub go to:

Lemon Sugar Scrub

Wednesday, January 15, 2014

DIY: Kid Activities

There are a lot of awesome DIY (Do-It-Yourself) projects that I have been wanting to try with Liam, so maybe if I can post them all in one place and write about the than it will help me find the time to actually get the stuff together and do them.  So I have decided that I should do this as a monthly thing and force myself to try a couple of things and then post how it all turned out.  I would love any suggestions for other DIY projects that I may not have come across on my own. 


Mind Jar

The alternative for a Time Out, I came across this one today and it is sparkly and fun, and possibly effective.  Although the original calls for a glass jar, I am more inclined to try this using plastic as it cannot be broken as easily.  I know when it is time for time-out for Liam, he is usually in a place where he is not at his calmest and may be inclined to throw something that I had to him regardless of how sparkly it is.  It was describes as:
"A Mind Jar is a meditation tool to use whenever a child feels stressed, overwhelmed or upset. Imagine the glitter as your thoughts. When you shake the jar, imagine your head full of whirling thoughts, then watch them slowly settle while you calm down". 

This can provide a nice alternative to a traditional timeout, and it encourages the child to refocus without punishing them. Although the kids and I just like to shake it up and sit and watch the glitter swirl around and around. Perhaps next time we'll make our own snow globe by gluing an object on the inside of the lid.

Supplies:
- Plastic Bottle (or you can use the mason jar or baby food jar that was in the original post)
- Glitter Glue
- Food Coloring
- Warm Water

Directions:
Mix about 1 tablespoon of glitter glue with 1 cup of warm water...depending on the size of your jar. My jar was a bit bigger so I used 2 tablespoons of glitter glue and 2 cups of warm water. I also added some blue food coloring since my kids like the color blue.

Note: The warm water is to help dissolve the glue. I had a hard time dissolving it...so I heated the water up in a microwave safe cup for 30-60 seconds. While the water is warm...the glitter will fall quickly. I noticed that it only took about 3 minutes for the glitter to fall while the water was warm...but it took a little over 5 minutes to finish falling once the water cooled down. If you do use this as an alternative to time-outs and think 5 minutes is too long for your child, you should play around with the water and glue ratio.

*My main question is, does this mean that you need to warm it up each time?  No one will have time for that if it is used as a possible timeout alternative.  I would find that you need to gauge it by what it is like cool and skip the warm water step.

 Salt Painting

This is a great and easy way to have a fun painting time at home with not too much of a mess.  I have seen a lot of people try this and similar things out in the past and have been wanting to try it with Liam since he is totally into creating different works of art. 


Supplies:
-Construction paper/cardstock
-Paintbrush and/or medicine dropper
-Colored water (we used about a tablespoon of water with 6-7 drops of food coloring)
-Salt
-Glue
-Little bowls for colored water


Directions:
Have your child draw a picture with glue.Then sprinkle the glue with salt.  We did this on top of a piece of cardboard, but a baking sheet will work well too. Next have your child take a paintbrush or a medicine dropper and drop colored water, one drop at a time onto the salt.
Some tips: Make sure they lightly touch the salt with the brush.  It also helps to have a bowl to clean the brush in between colors...otherwise you lose the colors start blending together and you lose the vibrant colors because they become murky.


Kool-Aid Dyed Rice & Pasta


This is a great way for what many people call "Sensory Learning."  It is suggested that you get a sensory bin (any kind of plastic shallow tray or bin) and then you want to have various colored objects of all shapes and sizes and then you child can learn from these things and play with them.  Personally I think that a lot of these things can double as art supplies if you have some glue on hand, to include this project.  

Supplies:
1 Cup Rice or 1 Cup Pasta
1/2 tsp Kool-Aid
1 tsp Rubbing Alcohol
Gallon or large plastic Ziplock bags
Tin Foil
Cookie Sheet

Directions:
Gather your tools and start by standing up and opening your large freezer bag. A freezer bag (and not just a regular gallon bag) is imperative for the dying process because of it's thickness--the bag will stand up on its own and will also hold up better to leakage than a standard bag. Use one bag for each color you wish to make.
First, have your child add 1 cup of rice to each bag. Then, have him or her scoop out a 1/2 teaspoon of power out of each Kool-Aid packet. (Each Kool-Aid packet typically has 1 teaspoon of powder in it.) Pour the powder on top of the rice. For the last step, which is a mama step, add 1 teaspoon of rubbing alcohol to each bag on top of the previous two ingredients.
Seal the bag shut (because I can attest that wet Kool-Aid rice is NOT a fun experience to clean up!) and shake it up (this can be a fun part in the process for the kids to do too)! Let it sit for at least 15 minutes to saturate.
Next, pour the wet rice out onto a tray and get it as flat as it will go so that you can dry it overnight (or for at least 6-8 hours). When I dye rice or pasta, I usually make little tin foil sections in the tray to separate the colors. When it is dry, the rice will be all clumped together; separate the rice grains with your hands. (This is also a fun step for kiddo involvement too!)